今天来实现一个简单的功能,通常blog后台编辑大多使用的是富文本编辑器,比如百度的,比较轻巧的,那么如何使用开源editor.md的markdown呢?
搭建一个springboot+mybatis的项目,然后通过markdown编辑器对表Content进行插入操作,下面开始
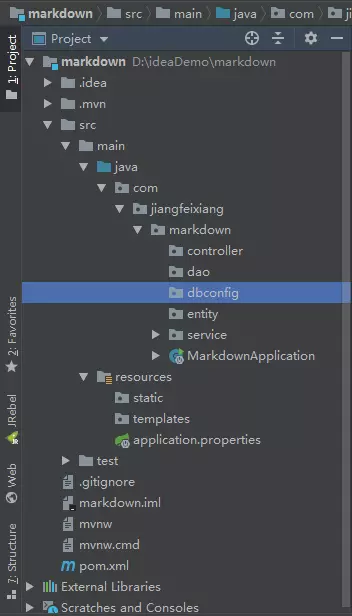
通过IDEA创建一个项目为markdown的springboot项目,结构如下:
添加依赖pom.xml
org.springframework.boot spring-boot-starter-thymeleaf org.springframework.boot spring-boot-starter-web org.mybatis.spring.boot mybatis-spring-boot-starter 1.3.2 mysql mysql-connector-java runtime com.alibaba druid 1.1.10 org.projectlombok lombok true org.springframework.boot spring-boot-starter-test test
第一步,整合整合mybatis配置
在application.properties中进行数据源配置以及其他配置项application.properties
#Tomcat配置server.port=8081server.tomcat.uri-encoding=UTF-8#thymeleaf配置spring.thymeleaf.prefix=classpath:/templates/##解决静态文件访问不到的情况spring.mvc.static-path-pattern= /static/**##mybatis配置mybatis.type-aliases-package= com.jiangfeixiang.springbootblog.entitymybatis.mapper-locations= mapper/*.xml## 数据库连接配置## 数据库连接配置spring.datasource.type=com.alibaba.druid.pool.DruidDataSourcespring.datasource.driver-class-name=com.mysql.jdbc.Driverspring.datasource.url=jdbc:mysql://localhost:3306/markdown?characterEncoding=utf-8&serverTimezone=GMT%2B8spring.datasource.username=rootspring.datasource.password=1234# 连接池补充配置# 初始化大小,最小,最大spring.datasource.initialSize: 5spring.datasource.minIdle: 5spring.datasource.maxActive: 20# 配置获取连接等待超时的时间spring.datasource.maxWait: 60000# 配置间隔多久才进行一次检测,检测需要关闭的空闲连接,单位是毫秒spring.datasource.timeBetweenEvictionRunsMillis: 60000# 配置一个连接在池中最小生存的时间,单位是毫秒spring.datasource.minEvictableIdleTimeMillis: 300000spring.datasource.validationQuery: SELECT 1 FROM DUALspring.datasource.testWhileIdle: truespring.datasource.testOnBorrow: falsespring.datasource.testOnReturn: false# 打开PSCache,并且指定每个连接上PSCache的大小spring.datasource.poolPreparedStatements: truespring.datasource.maxPoolPreparedStatementPerConnectionSize: 20# 配置监控统计拦截的filters,去掉后监控界面sql无法统计,'wall'用于防火墙spring.datasource.filters: {stat,wall,log4j}# 通过connectProperties属性来打开mergeSql功能;慢SQL记录spring.datasource.connectionProperties: druid.stat.mergeSql=true;druid.stat.slowSqlMillis=5000# 合并多个DruidDataSource的监控数据spring.datasource.useGlobalDataSourceStat: true 第二步,在dbconfig包下创建DruidConfig类配置druid数据连接池
DruidConfig.class
@Configurationpublic class DruidConfig { private Logger logger = LoggerFactory.getLogger(DruidConfig.class); @ConfigurationProperties(prefix = "spring.datasource") @Bean public DruidDataSource druid(){ return new DruidDataSource(); } @Bean public ServletRegistrationBean druidServlet() { logger.info("init Druid Servlet Configuration "); ServletRegistrationBean bean = new ServletRegistrationBean(new StatViewServlet(),"/druid/*"); Map params = new HashMap<>(); //用户名 params.put("loginUsername","姜飞祥"); //密码 params.put("loginPassword","1234"); //IP白名单 (不填写代表允许所有IP) params.put("allow",""); //IP黑名单 (存在共同时,deny优先于allow) //initParameters.put("deny", "192.168.20.38"); bean.setInitParameters(params); return bean; } /** * druid的过滤器设置 * @return */ @Bean public FilterRegistrationBean filterRegistrationBean() { FilterRegistrationBean bean = new FilterRegistrationBean(); bean.setFilter(new WebStatFilter()); Map initParams = new HashMap<>(); //排除拦截 initParams.put("exclusions","*.js,*.css,/druid/*"); bean.setInitParameters(initParams); bean.setUrlPatterns(Arrays.asList("/*")); return bean; }} 以上配置好之后开始完成实体类Content.class,在entity包中创建Content实体类
Content.class
/** * @Author: 姜飞祥 * @Description: * @Date: Create in 2019/1/29/0029 13:24 * 使用lombok注解@Data省略set/get方法 */@Datapublic class Content { private Integer id; /** * 内容 */ private String text;} 实体类完成之后就是dao与之对应的mapper.xml了,在dao包下创建ContentMapper接口
@Mapperpublic interface ContentMapper { /** * 查询文本内容 * @return */ List getText(); /** * 添加文本内容 * @param content * @return */ int addText(Content content);} 接口上使用了注解@Mapper,如果不使用此注解的话,可以做哎入口类上添加@MapperScan("com.jiangfeixiang.markdown.dao"),l选择其一即可如下
@SpringBootApplication@MapperScan("com.jiangfeixiang.markdown.dao")public class MarkdownApplication { public static void main(String[] args) { SpringApplication.run(MarkdownApplication.class, args); }} 下面是对应的ContentMapper.xml,在resources下mapper包中
insert into content(text) values(#{text})
到此dao部分已经完成了,下面创建对应的数据库添加一条数据,进行测试
- 数据库名称请跟进需求在配置文件数据源中进行修改
数据库sql
SET FOREIGN_KEY_CHECKS=0;DROP TABLE IF EXISTS `content`;CREATE TABLE `content` ( `id` int(11) NOT NULL AUTO_INCREMENT, `text` text, PRIMARY KEY (`id`)) ENGINE=InnoDB AUTO_INCREMENT=2 DEFAULT CHARSET=utf8;INSERT INTO `content` VALUES ('1', '第一天文本内容'); 数据库创建完成之后,接下来开始进行查询测试
@RunWith(SpringRunner.class)@SpringBootTestpublic class MarkdownApplicationTests { /** * 注入ContentMapper接口 */ @Autowired private ContentMapper contentMapper; /** * 查询 */ @Test public void getText() { Content text = contentMapper.getText(); System.out.println(text); }} 可以在控制台看到输出的内容:

下面为了节约时间,我service接口以及实现类就直接贴代码参考了,如下
ContentService 接口
public interface ContentService { /** * 查询文本内容 * @return */ List getText(); /** * 添加文本内容 * @param content * @return */ int addText(Content content);} ContentServiceImpl实现类
@Servicepublic class ContentServiceImpl implements ContentService { @Autowired private ContentMapper contentMapper; /** * 查询 * @return */ @Override public List getText() { return contentMapper.getText(); } /** * 添加 * @param content * @return */ @Override public int addText(Content content) { return contentMapper.addText(content); }} 接下来是ContentController
@Controllerpublic class ContentController { @Autowired private ContentService contentService; /** * 编辑页 * @return */ @RequestMapping("/edit") public String getText(){ return "context"; }} 访问URL路径进入编辑页edit.html,在templates/edit.html下,这里是咱们要实现的开源editor.md markdown编辑器

原材料准备
editor.md
是国人开发的开源在线Markdown编辑器,单纯基于前端JavaScript,无需后台代码加持,适用于任何语言
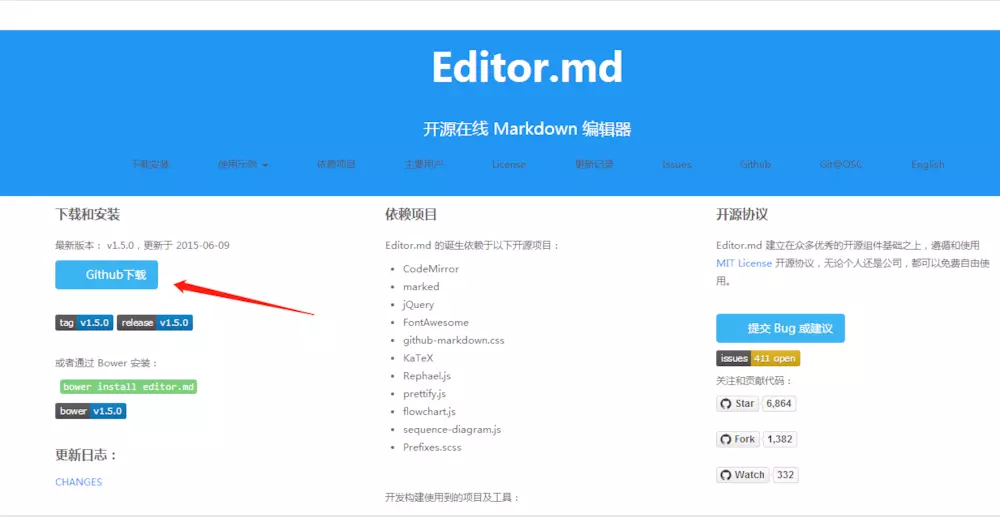
直接点击 Github下载 即可
下载好进行解压之后如下: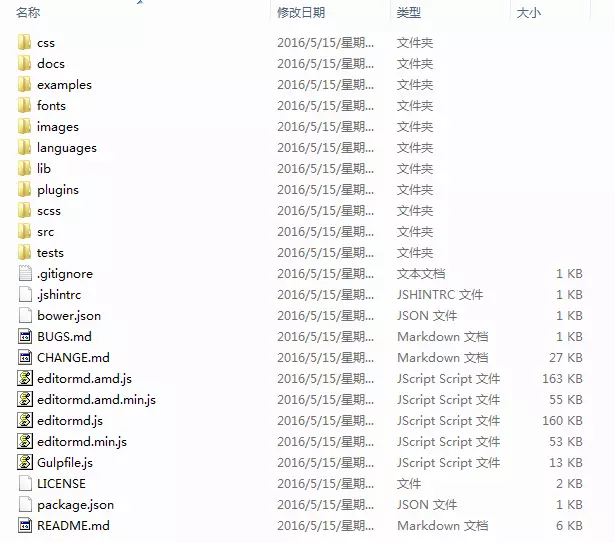
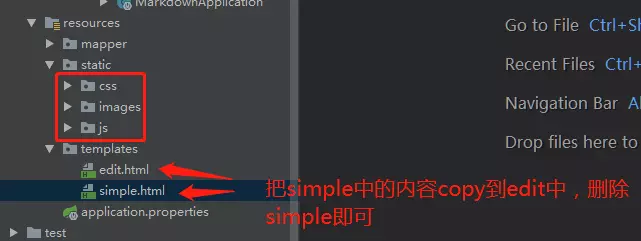
- 接下来直接将examples文件夹中的css、js资源,拷贝到resources下的static中
- 将examples文件夹中的simple.html示例文件拷贝到工程的templates下面,如下图
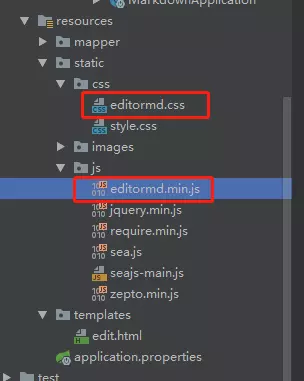
编辑edit.html文件,将资源文件js,css路径根据你的项目进行调整,由于edit.html中的editormd.css和editormd.min.js没有,这里需要进行拷贝进来,拷贝进来后如下图
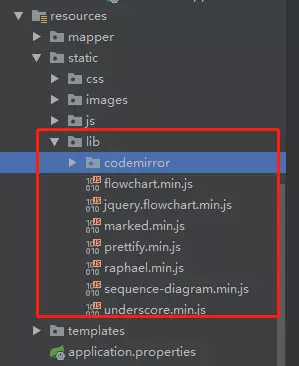
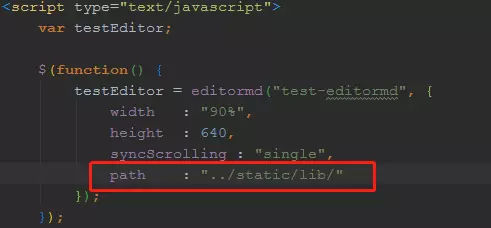
拷贝外层的lib目录并设置edit.html中对应的lib路径,如图:
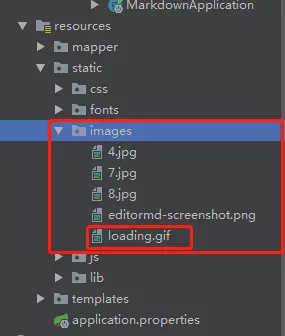
拷贝外层的fonts目录,并且将外层文件夹images中的loading.gif拷贝到我们项目的images中
最终 调整后的edit.html文件内容为

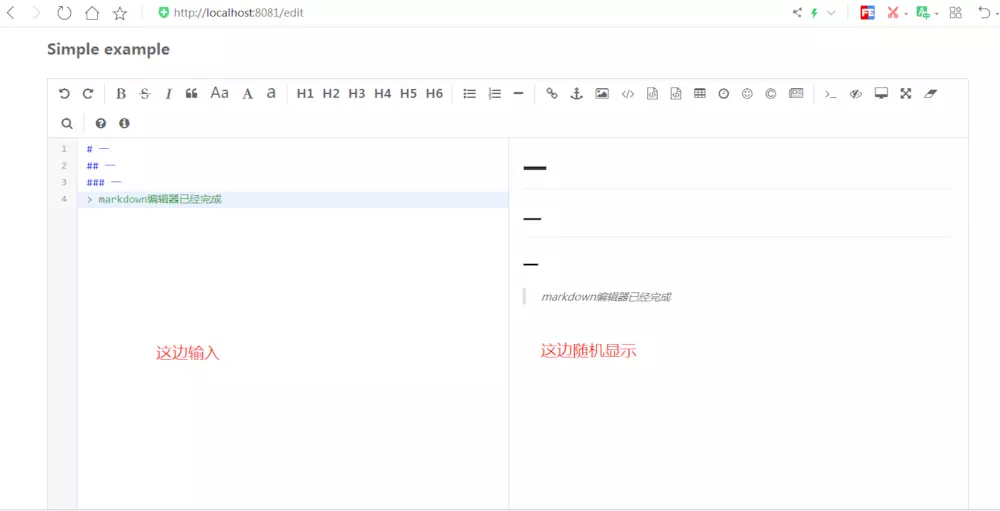
最后启动项目,访问localhost:8081/edit进入编辑页面
下面还没有完,接下来就是开始编写内容,进行提交到数据库了
开始提交
在eidt.html页面中,加入form表单,在text,修改JS,简单的提交客户端完成,内容如下: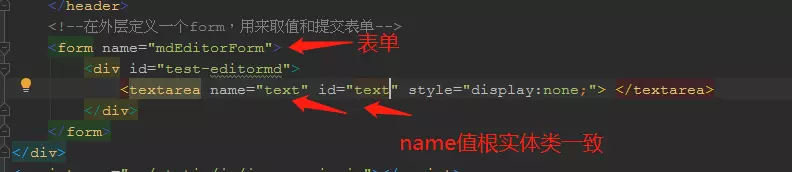
代码
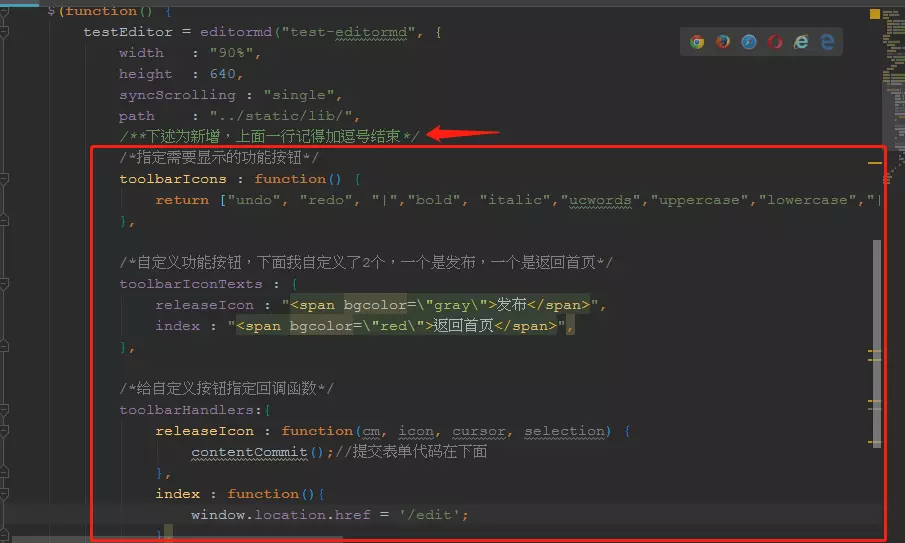
之后再新增js函数,如图
代码
/**下述为新增,上面一行记得加逗号结束*/ /*指定需要显示的功能按钮*/ toolbarIcons : function() { return ["undo", "redo", "|","bold", "italic","ucwords","uppercase","lowercase","|","h1","h2","h3","h4","h5","h6","|","list-ul","list-ol","table","datetime","hr", "||", "watch", "fullscreen", "preview", "releaseIcon", "index"] }, /*自定义功能按钮,下面我自定义了2个,一个是发布,一个是返回首页*/ toolbarIconTexts : { releaseIcon : "发布", index : "返回首页", }, /*给自定义按钮指定回调函数*/ toolbarHandlers:{ releaseIcon : function(cm, icon, cursor, selection) { contentCommit();//提交表单代码在下面 }, index : function(){ window.location.href = '返回首页的路径.html'; }, } 另外上面需要提交JS的代码contentCommit();
/*提交表单的js*/ function contentCommit(){ mdEditorForm.method = "post"; mdEditorForm.action = "addText";//提交至服务器的路径 mdEditorForm.submit(); } 最后在Controller中编写提交的方法,返回成功页面
@RequestMapping("/addText") public String addText(Content content){ contentService.addText(content); return "success"; } 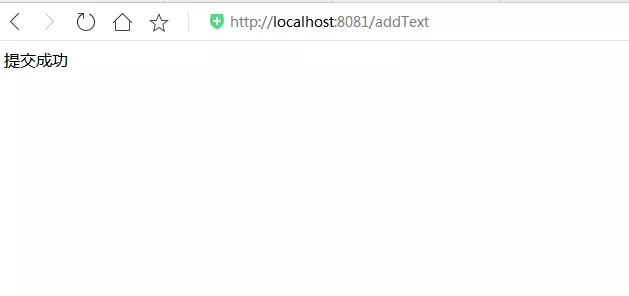
因为查询没有显示数据页面,为了节省时间,查询返回的页面就不写了,为了验证是否提交成功,咱还在测试里进行测试
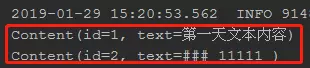
 有两条记录
有两条记录